CueNIMBY tutorial
Step-by-step tutorial for configuring and using CueNIMBY
This tutorial guides you through setting up and using CueNIMBY, a Qt-based system tray application with professional icons featuring the OpenCue logo, to control your workstation’s rendering availability. You’ll learn how to install CueNIMBY, configure it for your environment, understand the enhanced status states with emoji hints (🔒❌⚠️🔧), set up time-based scheduling, and integrate it with your daily workflow. CueNIMBY starts even when CueBot is unreachable and provides clear visual feedback for connection issues.
What you’ll learn
- How to install and configure CueNIMBY
- How to understand the icon states with OpenCue logo
- How to monitor your workstation’s rendering state with enhanced status detection
- How to manually control rendering availability
- How to use the “Launch CueGUI” feature for quick access
- How to set up time-based scheduling
- How to customize notifications with emoji hints
- How to handle connection issues (CueBot unreachable, host not found, host lagging)
- How to integrate CueNIMBY with RQD
Prerequisites
- OpenCue environment set up and running
- Access to a Cuebot server
- RQD running on your workstation (optional but recommended)
- Basic familiarity with JSON configuration files
Step 1: Install CueNIMBY
1.1 Verify prerequisites
First, ensure you have Python 3.7 or later:
python --version
# or
python3 --version
You should see output like Python 3.9.x or higher.
1.2 Install OpenCue client libraries
If not already installed:
pip install opencue-pycue
1.3 Install CueNIMBY
From the OpenCue repository:
cd OpenCue/cuenimby
pip install .
1.4 Verify installation
cuenimby --version
You should see the CueNIMBY version number.
Checkpoint: CueNIMBY is installed and ready to use.
Step 2: First run and initial configuration
2.1 Start CueNIMBY
Run CueNIMBY from the terminal:
cuenimby --verbose
The --verbose flag helps you see what’s happening during first run.
2.2 Observe the output
You should see output similar to:
2025-10-01 10:00:00 - cuenimby - INFO - Starting CueNIMBY v1.0.0
2025-10-01 10:00:00 - cuenimby - INFO - Connecting to Cuebot at localhost:8443
2025-10-01 10:00:00 - cuenimby.config - INFO - Created config file: /home/user/.opencue/cuenimby.json
2025-10-01 10:00:00 - cuenimby.monitor - INFO - Connected to Cuebot
2025-10-01 10:00:00 - cuenimby.monitor - INFO - Monitor started
2025-10-01 10:00:00 - cuenimby.tray - INFO - CueNIMBY tray started
2.3 Find the tray icon
Look for the CueNIMBY icon in your system tray:
- macOS: Menu bar (top-right corner)
- Windows: Notification area (bottom-right corner, may be hidden)
- Linux: System tray (location depends on desktop environment)
The icon color indicates your workstation’s current state.
2.4 Examine the configuration file
CueNIMBY created a default configuration file. Let’s look at it:
cat ~/.opencue/cuenimby.json
You should see:
{
  "cuebot_host": "localhost",
  "cuebot_port": 8443,
  "hostname": null,
  "poll_interval": 5,
  "show_notifications": true,
  "notification_duration": 5,
  "scheduler_enabled": false,
  "schedule": {}
}
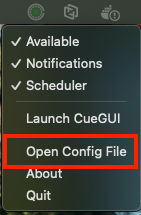
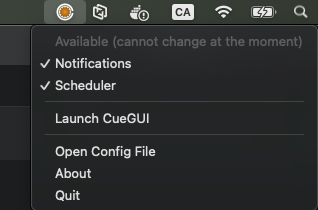
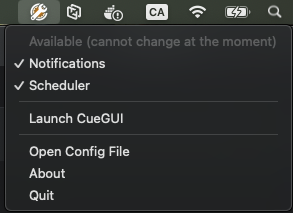
You can also open the configuration file directly from the tray menu using the Open Config File option:
macOS:
Checkpoint: CueNIMBY is running and you can see the tray icon.
Step 3: Configure Cuebot connection
3.1 Stop CueNIMBY
Press Ctrl+C in the terminal where CueNIMBY is running, or right-click the tray icon and select “Quit”.
3.2 Edit the configuration
Open the configuration file in your text editor:
nano ~/.opencue/cuenimby.json
# or
vim ~/.opencue/cuenimby.json
# or
code ~/.opencue/cuenimby.json
3.3 Update Cuebot connection settings
Replace localhost with your Cuebot server’s hostname:
{
  "cuebot_host": "cuebot.example.com",
  "cuebot_port": 8443,
  "hostname": null,
  "poll_interval": 5,
  "show_notifications": true,
  "notification_duration": 5,
  "scheduler_enabled": false,
  "schedule": {}
}
Save the file.
3.4 Restart CueNIMBY
cuenimby
Note: We’re not using --verbose this time since we verified it works.
3.5 Verify connection
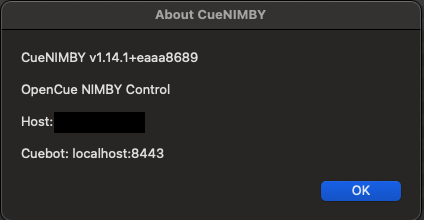
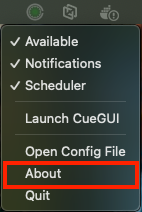
Right-click the tray icon and select “About”. You should see:
- CueNIMBY version
- CueBot server address (e.g., cuebot.example.com:8443)
- Monitored hostname
- Application description
This enhanced About dialog helps with troubleshooting connection issues.
macOS:
Checkpoint: CueNIMBY is connected to your Cuebot server.
Step 4: Test manual control
4.1 Check current state
Look at the tray icon (professional icons with OpenCue logo):
- 🔄 Starting (
opencue-starting.png) = Application initializing - 🟢 Available (
opencue-available.png) = Ready for rendering - 🔴 Working (
opencue-working.png) = Currently rendering (red dot in center) - 🔴 Disabled (
opencue-disabled.png) = Manually locked, NIMBY locked, or host down - ❌ Error (
opencue-error.png) = CueBot unreachable or host not found - ⚠️ Warning (
opencue-warning.png) = Host lagging (ping > 60s) - 🔧 Repair (
opencue-repair.png) = Under repair - ❓ Unknown (
opencue-unknown.png) = Unknown status
macOS - Available status:
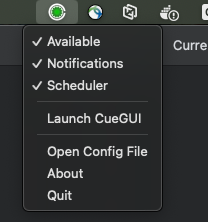
Windows - Available status:
Icon Gallery
Visual representation of all CueNIMBY icons:
| Icon | File | Description |
|---|---|---|
opencue-available.png |
Green - Ready for rendering | |
opencue-working.png |
Icon with red dot in center - Currently rendering | |
opencue-disabled.png |
Red - Locked/disabled | |
opencue-error.png |
Red X - Error/unreachable | |
opencue-warning.png |
Yellow - Warning/lagging | |
opencue-repair.png |
Orange - Under repair | |
opencue-starting.png |
Gray - Initializing | |
opencue-unknown.png |
Gray ? - Unknown | |
opencue-default.png |
Default fallback |
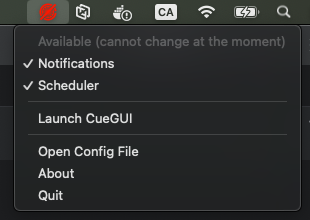
4.2 Disable rendering
- Right-click the CueNIMBY icon
- Uncheck “Available”
macOS:
Observe:
- Icon turns red (🔴)
- You receive a notification: “Host Disabled”
- Title shows “CueNIMBY - Disabled”
macOS - Disabled status:
4.3 Verify in CueGUI (if available)
You can launch CueGUI directly from the CueNIMBY tray menu:
macOS:
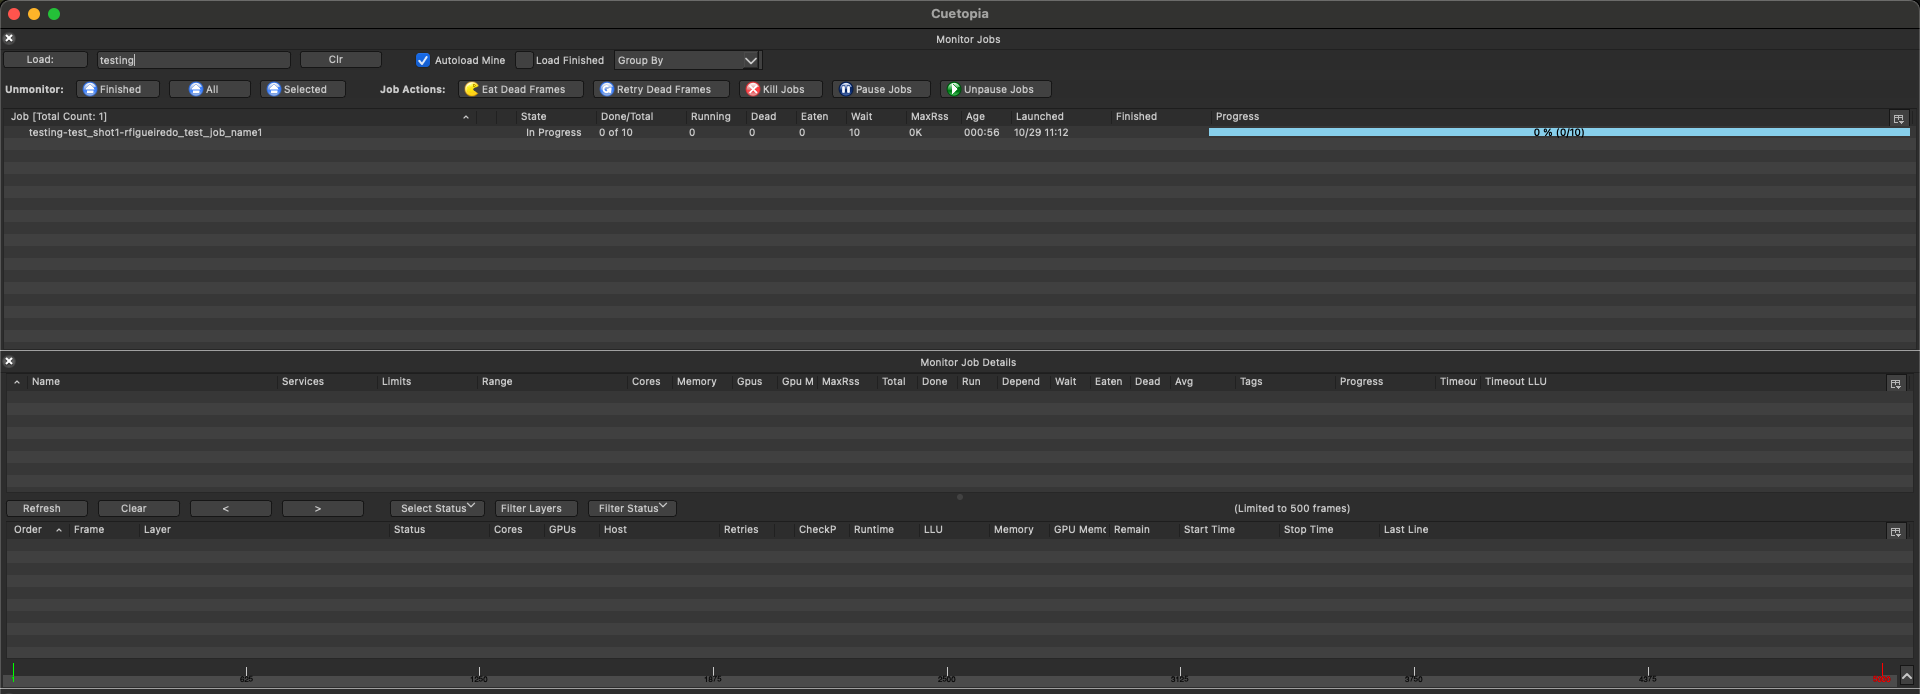
If you have CueGUI open:
- Go to the Hosts view
- Find your workstation
- Observe the lock icon indicating the host is locked
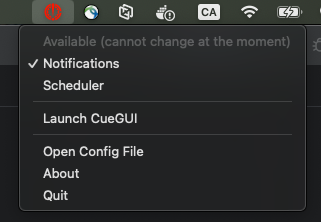
4.4 Re-enable rendering
- Right-click the CueNIMBY icon
- Check “Available”
Observe:
- Icon turns green (🟢)
- You receive a notification: “Host Enabled”
- Title shows “CueNIMBY - Available”
Checkpoint: You can manually control your workstation’s availability.
Step 5: Test job notifications
5.1 Ensure notifications are enabled
Right-click the tray icon and verify “Notifications” is checked.
5.2 Submit a test job
Submit a simple test job to OpenCue that will run on your workstation:
# Example using cuesubmit or cuerun
echo "#!/bin/bash\necho 'Test frame'\nsleep 10" > /tmp/test_job.sh
chmod +x /tmp/test_job.sh

# Submit job (adjust for your environment)
cuerun -s myshow -shot test /tmp/test_job.sh
5.3 Observe notifications
When the job starts on your workstation, you should receive a notification:
OpenCue - Frame Started
Rendering: myshow/test
5.4 Watch state changes
- Icon shows red dot in center (🔴) when frame starts
- Icon turns green (🟢) when frame completes
Checkpoint: You receive notifications when jobs start on your machine.
Step 6: Configure time-based scheduling
Now let’s set up automatic scheduling to disable rendering during work hours.
6.1 Stop CueNIMBY
Quit CueNIMBY (right-click -> Quit).
6.2 Edit configuration
Open ~/.opencue/cuenimby.json:
{
  "cuebot_host": "cuebot.example.com",
  "cuebot_port": 8443,
  "hostname": null,
  "poll_interval": 5,
  "show_notifications": true,
  "notification_duration": 5,
  "scheduler_enabled": true,
  "schedule": {
    "monday": {
      "start": "09:00",
      "end": "18:00",
      "state": "disabled"
    },
    "tuesday": {
      "start": "09:00",
      "end": "18:00",
      "state": "disabled"
    },
    "wednesday": {
      "start": "09:00",
      "end": "18:00",
      "state": "disabled"
    },
    "thursday": {
      "start": "09:00",
      "end": "18:00",
      "state": "disabled"
    },
    "friday": {
      "start": "09:00",
      "end": "18:00",
      "state": "disabled"
    }
  }
}
This configuration:
- Disables rendering Mon-Fri 9am-6pm
- Enables rendering 6pm-9am and weekends
6.3 Restart CueNIMBY
cuenimby
6.4 Verify scheduler is active
Right-click the tray icon and verify “Scheduler” is checked.
6.5 Test scheduler behavior
During work hours (9am-6pm):
- Icon should be red (🔴)
- Manual toggle temporarily overrides, but scheduler resets every minute
Outside work hours:
- Icon should be green (🟢) if idle, or show red dot in center (🔴) if rendering
Checkpoint: Scheduler automatically controls your workstation based on time.
Step 7: Customize notification behavior
7.1 Adjust notification duration
Edit ~/.opencue/cuenimby.json:
{
  "notification_duration": 10
}
This makes notifications stay visible for 10 seconds instead of 5.
7.2 Test with a job
Submit another test job and observe the longer notification duration.
7.3 Disable notifications temporarily
If notifications become distracting:
- Right-click tray icon
- Uncheck “Notifications”
State changes still occur, but without desktop alerts.
7.4 Re-enable when needed
Check “Notifications” again to resume alerts.
Checkpoint: You can customize notification behavior.
Step 8: Configure for production use
8.1 Optimize poll interval
For production, you might want to adjust the poll interval based on your needs:
{
  "poll_interval": 10
}
- Lower (5): More responsive, slightly higher resource usage
- Higher (10-30): Less responsive, lower resource usage
8.2 Set up automatic startup
macOS:
Create ~/Library/LaunchAgents/com.opencue.cuenimby.plist:
<?xml version="1.0" encoding="UTF-8"?>
<!DOCTYPE plist PUBLIC "-//Apple//DTD PLIST 1.0//EN" "http://www.apple.com/DTDs/PropertyList-1.0.dtd">
<plist version="1.0">
<dict>
    <key>Label</key>
    <string>com.opencue.cuenimby</string>
    <key>ProgramArguments</key>
    <array>
        <string>/usr/local/bin/cuenimby</string>
    </array>
    <key>RunAtLoad</key>
    <true/>
    <key>KeepAlive</key>
    <false/>
</dict>
</plist>
Load it:
launchctl load ~/Library/LaunchAgents/com.opencue.cuenimby.plist
Linux:
Create ~/.config/autostart/cuenimby.desktop:
[Desktop Entry]
Type=Application
Exec=cuenimby
Hidden=false
NoDisplay=false
X-GNOME-Autostart-enabled=true
Name=CueNIMBY
Comment=OpenCue workstation control
Windows:
- Press
Win+R - Type
shell:startup - Create a shortcut to
cuenimbyin the startup folder
Checkpoint: CueNIMBY starts automatically on login.
Step 9: Integration with RQD
If you have RQD running on your workstation, you can use both together.
9.1 Configure RQD for NIMBY
Ensure RQD is configured with NIMBY enabled (this is usually the default for workstations).
9.2 Test automatic locking
With both RQD and CueNIMBY running:
- Start a job on your workstation
- Move your mouse or type on keyboard
- Observe:
- RQD detects activity and locks the host
- CueNIMBY icon shows disabled state (🔒)
- You receive “🔒 NIMBY Locked” notification with emoji hint
- Running job is killed
9.3 Test automatic unlocking
- Stop using keyboard/mouse
- Wait 5 minutes (default RQD idle timeout)
- Observe:
- RQD detects idle and unlocks
- CueNIMBY icon turns green (🟢)
- You receive “NIMBY Unlocked” notification
9.4 Understand the interaction
- RQD: Automatic protection based on activity
- CueNIMBY: Visual feedback + manual control + scheduling
Both work together seamlessly!
Checkpoint: RQD and CueNIMBY work together for complete control.
Step 10: Advanced configurations
10.1 Split shift schedule
For users with split shifts:
{
  "schedule": {
    "monday": {
      "start": "09:00",
      "end": "17:00",
      "state": "disabled"
    }
  }
}
Note: Current version supports one period per day. Choose the most important period.
10.2 Lunch hour availability
Enable rendering during lunch:
{
  "schedule": {
    "monday": {
      "start": "12:00",
      "end": "13:00",
      "state": "available"
    }
  }
}
10.3 Remote monitoring
Monitor a different host:
cuenimby --hostname render-node-05
Useful for administrators monitoring multiple machines.
Checkpoint: You understand advanced configuration options.
Troubleshooting
Issue: Icon doesn’t appear
Linux: Ensure your desktop environment supports system tray with Qt6. Works on GNOME, KDE, XFCE, and others.
macOS/Windows: Check system tray settings and restart CueNIMBY.
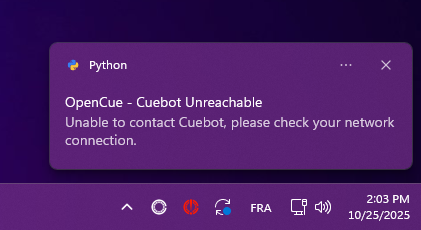
Issue: Can’t connect to Cuebot
CueNIMBY will now start even when CueBot is unreachable and show an ❌ error icon.
macOS - Connection error:
Windows - Connection error:
# Check the tray icon tooltip for specific error message
# Verify configuration
cat ~/.opencue/cuenimby.json

# Test connection
telnet cuebot.example.com 8443

# Run with verbose logging
cuenimby --verbose
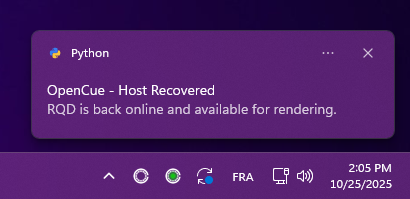
CueNIMBY will automatically reconnect when CueBot becomes available.
Issue: Host not found
If you see ❌ “Machine not found on CueBot, check if RQD is running”:
# Check if RQD is running
ps aux | grep rqd

# Check RQD logs
tail -f /var/log/rqd.log

# Verify hostname matches
hostname
Use --hostname flag if needed: cuenimby --hostname your-exact-hostname
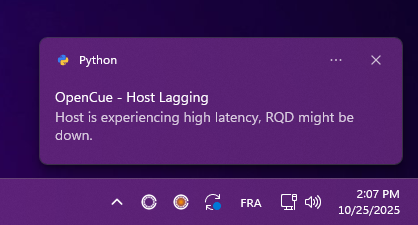
Issue: Host lagging
If you see ⚠️ “Host ping above limit” warning:
macOS - Host lagging:
Windows - Host lagging:
- Check if RQD is still running
- Verify network connection is stable
- Review RQD logs for connection errors
- Consider restarting RQD
Issue: Host under repair
If you see 🔧 “Under Repair” status:
macOS - Under repair:
Windows - Under repair:
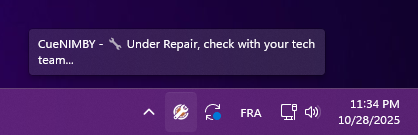
- Contact your technical team
- Host has been marked for maintenance
- No rendering will occur until cleared
Issue: Notifications not working
macOS:
# Best option: install terminal-notifier
brew install terminal-notifier

# Alternative: install pync
pip install pync
Windows:
pip install win10toast
Linux:
pip install notify2
Summary
Congratulations! You’ve completed the CueNIMBY tutorial. You now know how to:
- Install and configure CueNIMBY
- Understand the icon states with professional OpenCue logo
- Monitor your workstation’s rendering state with enhanced status detection
- Handle connection issues (CueBot unreachable, host not found, host lagging, under repair)
- Recognize emoji hints (🔒❌⚠️🔧) for quick status recognition
- Manually control rendering availability
- Use the “Launch CueGUI” feature for quick access (when available)
- Open and edit the configuration file directly from the tray
- Set up time-based scheduling
- Customize notifications
- Integrate with RQD for complete NIMBY control
CueNIMBY is a Qt-based application that starts even when CueBot is unreachable and provides clear visual feedback for all states!
Further reading
- Desktop rendering control guide - Learn about allocations, subscriptions, and how desktop rendering is controlled in OpenCue
- CueNIMBY user guide - Complete reference for all CueNIMBY features
- NIMBY concept guide - Understand the NIMBY system architecture
- CueNIMBY command reference - All command-line options and configuration parameters