Quick start for Linux
Try OpenCue in the sandbox environment on Linux
OpenCue is an open source render management system used in visual effects and animation production. It breaks down complex rendering jobs into individual tasks, manages a queue that allocates rendering resources, and allows you to monitor jobs from your workstation.
The sandbox environment provides a quick way to test OpenCue locally using Docker containers. This setup is ideal for small tests, development work, or learning OpenCue.
Time required: Approximately 20 minutes
Before you begin
Ensure you have the following software installed:
Required software:
- Python 3.7 or later
- pip (Python package installer)
- On some systems, this may be
pip3
- On some systems, this may be
- Python development headers:
- Ubuntu/Debian:
python3-devpackage - Fedora/CentOS/RHEL:
python3-develpackage
- Ubuntu/Debian:
- Docker (with Docker Engine running)
- Docker Compose v2 or later
Get the source code:
Choose one of these methods:
-
Download ZIP: Download and extract the OpenCue source code
-
Clone with Git:
git clone https://github.com/AcademySoftwareFoundation/OpenCue.git
Step-by-step installation
Step 1: Prepare your system
- Add your user to the docker group (if not already done):
sudo gpasswd -a $USER dockerLog out and back in for this change to take effect.
- Create mount directories for RQD:
mkdir -p /tmp/rqd/logs /tmp/rqd/shotsThese directories store rendering logs and job output.
Step 2: Deploy the sandbox environment
The sandbox deploys three main components via Docker:
- PostgreSQL database
- Cuebot server (render farm manager)
- RQD (rendering host daemon)
- Navigate to the OpenCue directory:
cd OpenCue - Build the Cuebot container:
docker build -t opencue/cuebot -f cuebot/Dockerfile . - Start the sandbox services:
docker compose upWait for startup to complete. You’ll see output like:
rqd-1     | WARNING   openrqd-__main__  : RQD Starting Up
rqd-1     | WARNING   openrqd-rqcore    : RQD Started
Keep this terminal running - it displays service logs.
Step 3: Install OpenCue client tools
OpenCue provides several client tools:
- PyCue: Python API for OpenCue
- PyOutline: Python library for job specifications
- CueSubmit: GUI for submitting rendering jobs
- CueGUI: GUI for monitoring and managing jobs
- cueadmin: Command-line administration tool
- cueman: Job management and batch control CLI tool
- pycuerun: Command-line job submission tool
In a new terminal window:
- Navigate to OpenCue directory:
cd OpenCue - Create a Python virtual environment:
python3 -m venv sandbox-venv - Activate the virtual environment:
source sandbox-venv/bin/activate - Install client packages from source:
sandbox/install-client-sources.shThis script installs all OpenCue Python client libraries directly from the source code, including:
- Protocol buffers package (proto/)
- PyCue, PyOutline, cueadmin, cueman, cuesubmit, and cuegui
This is the most stable installation method and works well with the main codebase.
Step 4: Verify the installation
- Check connection to sandbox:
cueadmin -lhExpected output:
Host Load NIMBY freeMem freeSwap freeMcp Cores Mem Idle Os Uptime State Locked Alloc Thread 123.456.789.0 275 False 4.1G 1.5G 154.4G 9.0 8.5G [ 9.00 / 8.5G ] Linux 08:08 UP OPEN local.general AUTO -
Submit a test job:
Launch CueSubmit:
cuesubmit &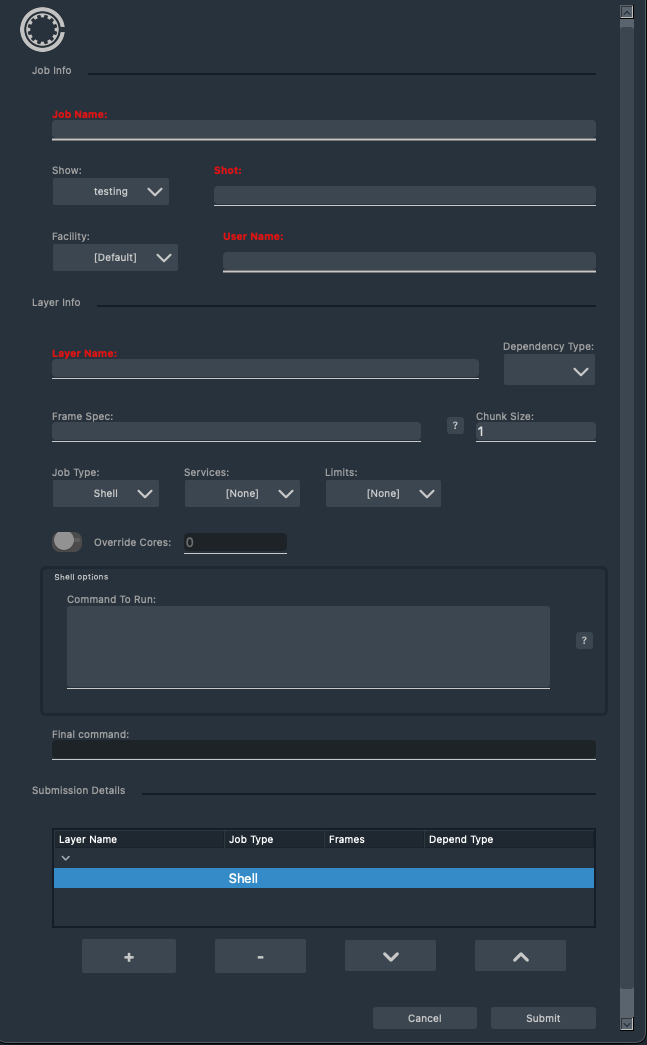
Enter these values:
- Job Name:
HelloWorld - Shot:
test-shot - User Name: Use a valid username here
- Layer Name:
test-layer - Command To Run:
echo "Output from frame: #IFRAME#; layer: #LAYER#; job: #JOB#" - Frame Spec:
1-10
Click Submit.
- Job Name:
-
Monitor the job:
Launch CueGUI:
cuegui &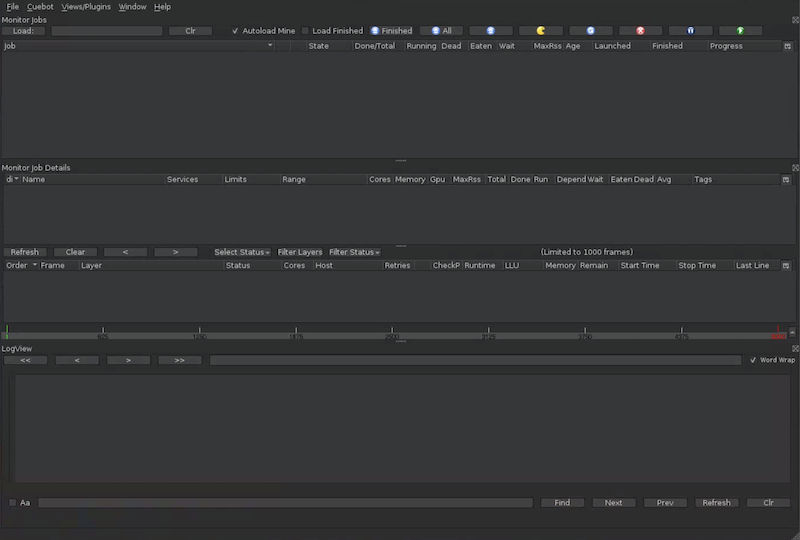
- Click Load to see your job
- Double-click the job to view frames
- Check the LogView for output like:
Output from frame: 9; layer: test_layer; job: testing-test_shot-username_helloworld
Cleaning up
To remove the sandbox environment:
- Stop services and remove containers:
docker compose --profile all down - Remove data volumes (database, Prometheus, Grafana, Elasticsearch):
docker compose --profile all down -v - Remove Python virtual environment:
rm -rf sandbox-venv